How to Use a Hotfix Tool for Clean and Long Lasting Results
A hotfix tool is used to attach rhinestones, sequins, or decorative hotfix elements to fabric using heat. This technique is widely used in fashion, costumes, and DIY projects because it creates neat, professional looking embellishments that can last through regular use.
When used correctly, hotfix elements adhere securely without damaging the fabric. Here is a complete guide on how to use a hotfix tool, suitable for beginners and professionals alike.
What Is a Hotfix Tool?
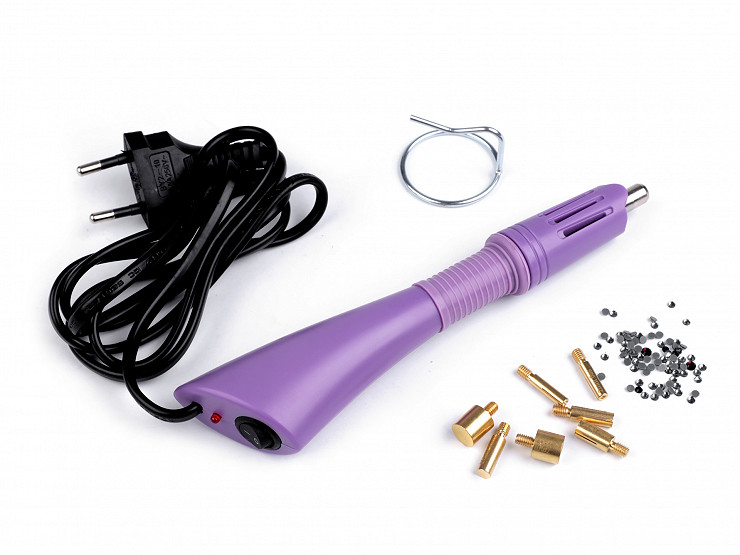
A hotfix tool is a heating device, such as a hotfix applicator pen, iron, or heat press, designed to melt the adhesive on the back of rhinestones or motifs so they bond to fabric.
It is commonly used to decorate clothing, bags, shoes, hijabs, and handmade accessories.
Tools and Materials You Will Need
Before starting, prepare:
-
Hotfix tool or applicator
-
Hotfix rhinestones or motifs
-
Fabric or item to decorate
-
Heat resistant surface
-
Tweezers or wax picker
-
Baking paper or protective sheet, optional
Step by Step Guide to Using a Hotfix Tool
1. Heat the Tool![]()

Turn on the hotfix tool and allow it to reach the recommended temperature. Proper heat ensures the adhesive melts evenly.
2. Prepare the Fabric Surface
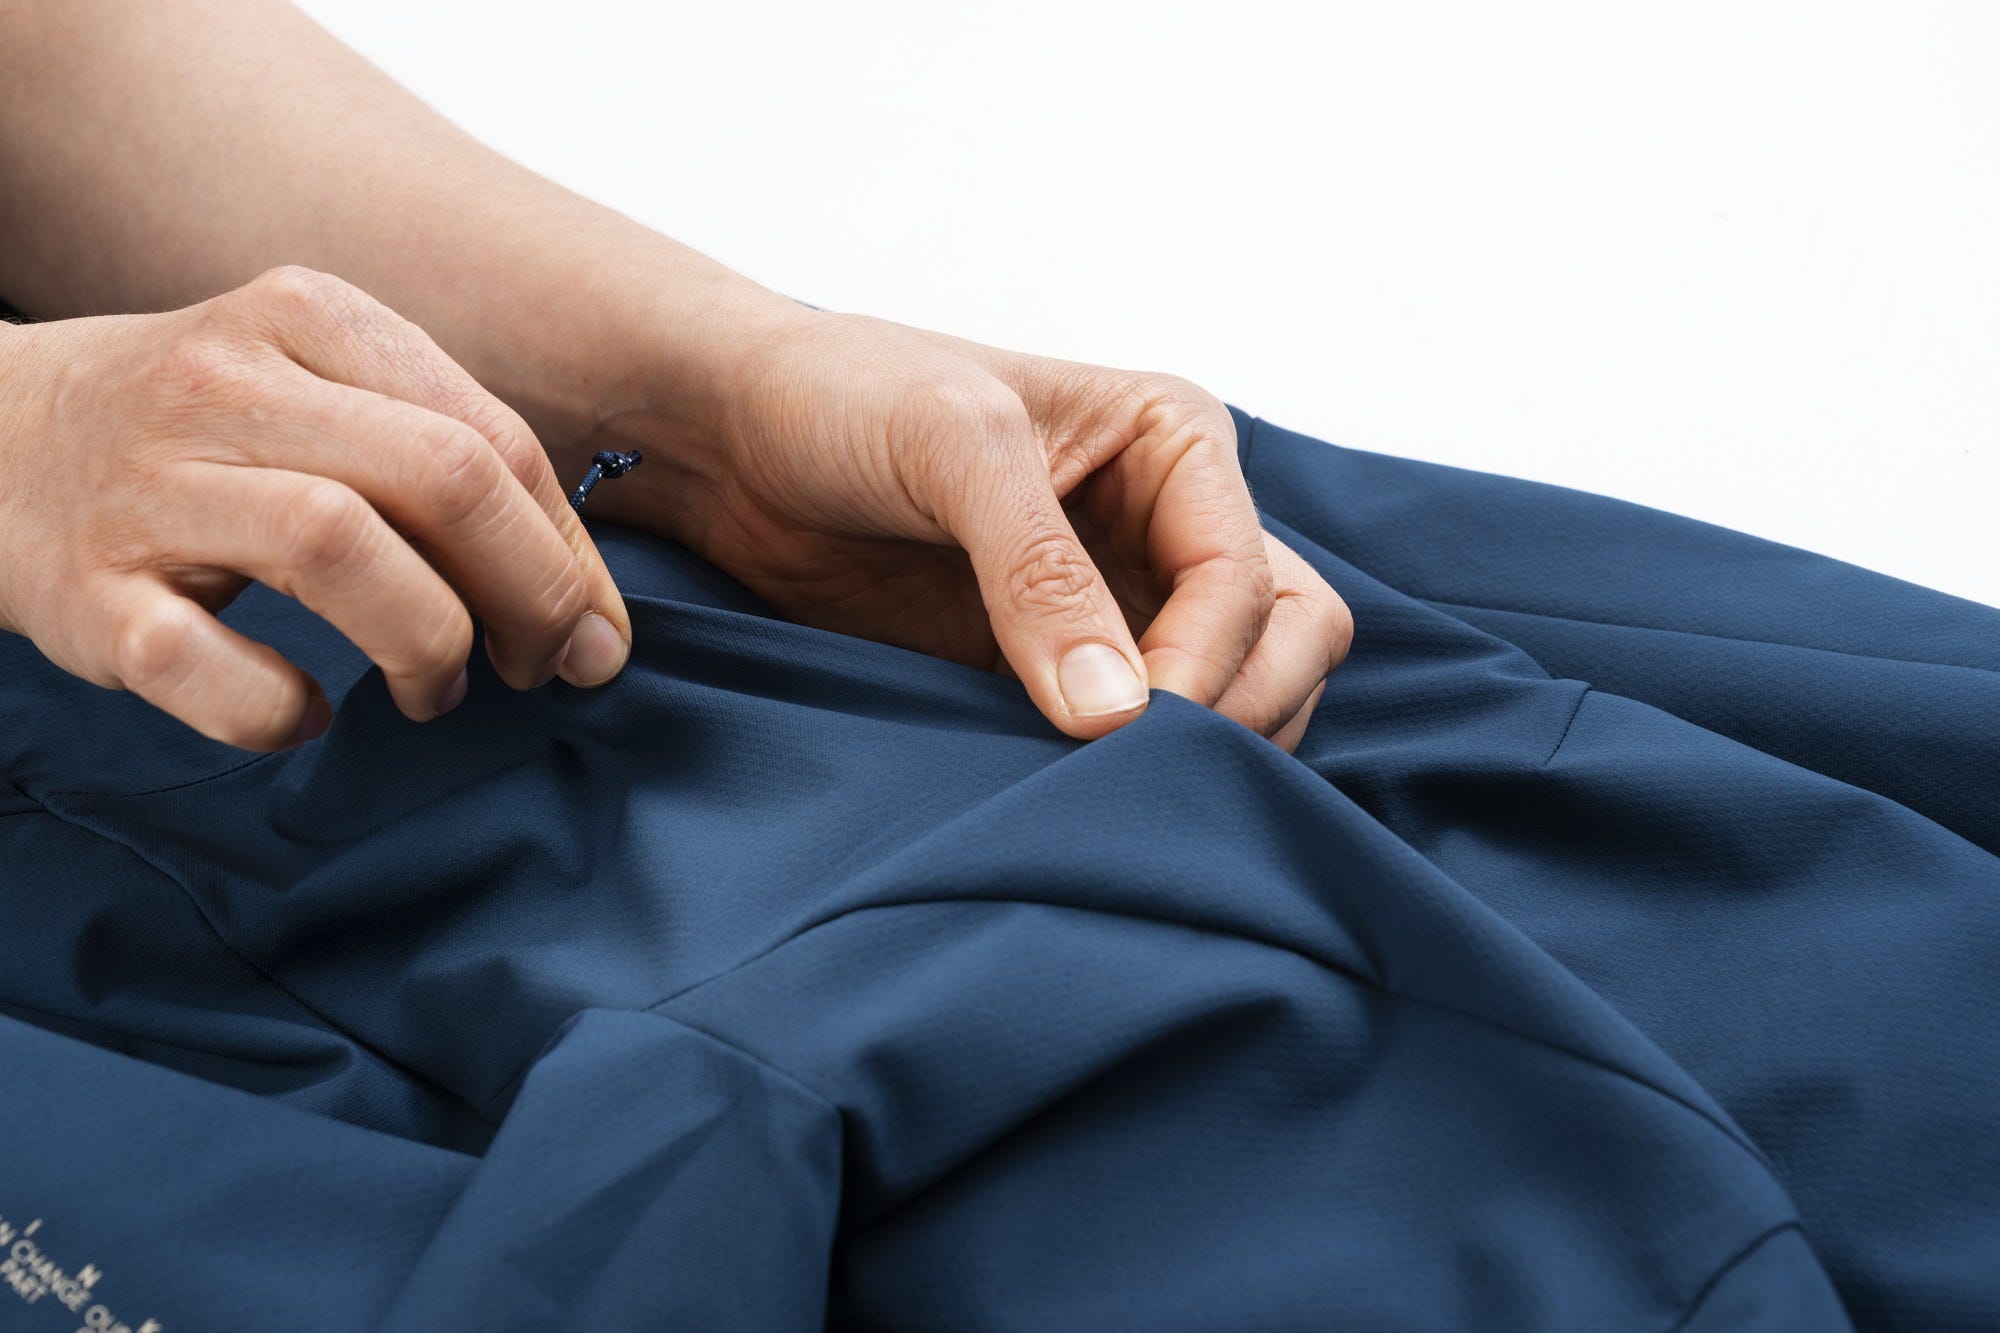
Make sure the fabric is clean, dry, and laid flat on a stable, heat resistant surface.
3. Position the Rhinestones or Motifs

Use tweezers to place each hotfix element exactly where you want it. Double check placement before applying heat.
4. Apply Heat

Gently press the tip of the hotfix tool onto the rhinestone for a few seconds until the adhesive melts and bonds to the fabric. Avoid sliding the tool.
5. Let It Cool

Allow the hotfix to cool completely before touching so the adhesive can set properly.
6. Check Adhesion

Lightly test to ensure it is securely attached. Reapply heat briefly if needed.
Tips for Stronger Adhesion
-
Use the correct temperature setting
-
Avoid very thin fabrics without backing
-
Use baking paper to protect fabric from excess heat
-
Test on scrap fabric first
-
Choose high quality hotfix materials
Common Mistakes to Avoid
-
Moving the tool while adhesive is melting
-
Touching hotfix before it cools
-
Applying excessive pressure
-
Working on dirty or damp fabric
-
Using inconsistent heat
Final Thoughts
Using a hotfix tool is simple once you understand the technique. With proper preparation and heat control, you can create decorative details that look clean, durable, and professionally finished.
Whether for DIY projects, fashion production, or creative customization, hotfix is an effective way to add eye catching embellishments to textile products.


